
How to Register as a Seller on GeM: Step-by-Step (2026)
Published On: 18 July 2026
Most guides to GeM registration are either out of date or skip the screens where people actually get stuck. This one doesn't. We registered a real business on GeM and walked through every screen — so you can follow along exactly, in 2026, without guessing. New to GeM entirely? Start with what GeM is and how it works, then come back here to sign up.
What you need before you start
Keep these ready so you don't get stuck halfway:
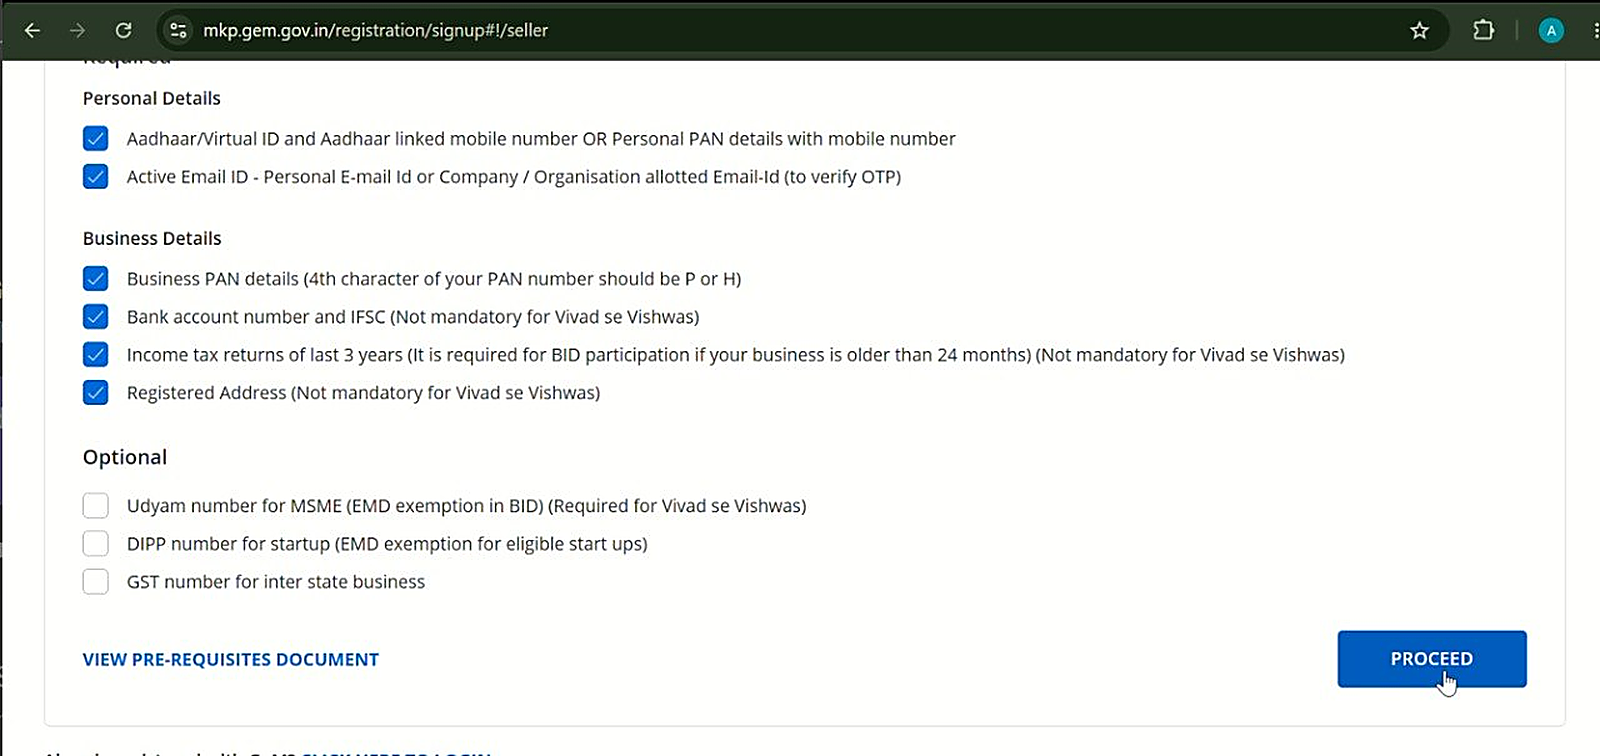
- PAN — of the business, and of the authorised person registering it.
- An Aadhaar-linked mobile number — the identity check sends an OTP to it.
- A working email address — all GeM alerts and password resets go here.
- GST details — if your business is GST-registered.
- Udyam registration — if you're an MSME. This is what unlocks EMD exemption and the tenders reserved for small businesses. (What is Udyam?)
- Bank account details of the business — account number and IFSC.
A note on terms: GeM calls sellers of goods "Sellers" and sellers of services "Service Providers." The registration flow is the same — pick whichever matches what you sell.
Step 1 — Open GeM and start the seller sign-up
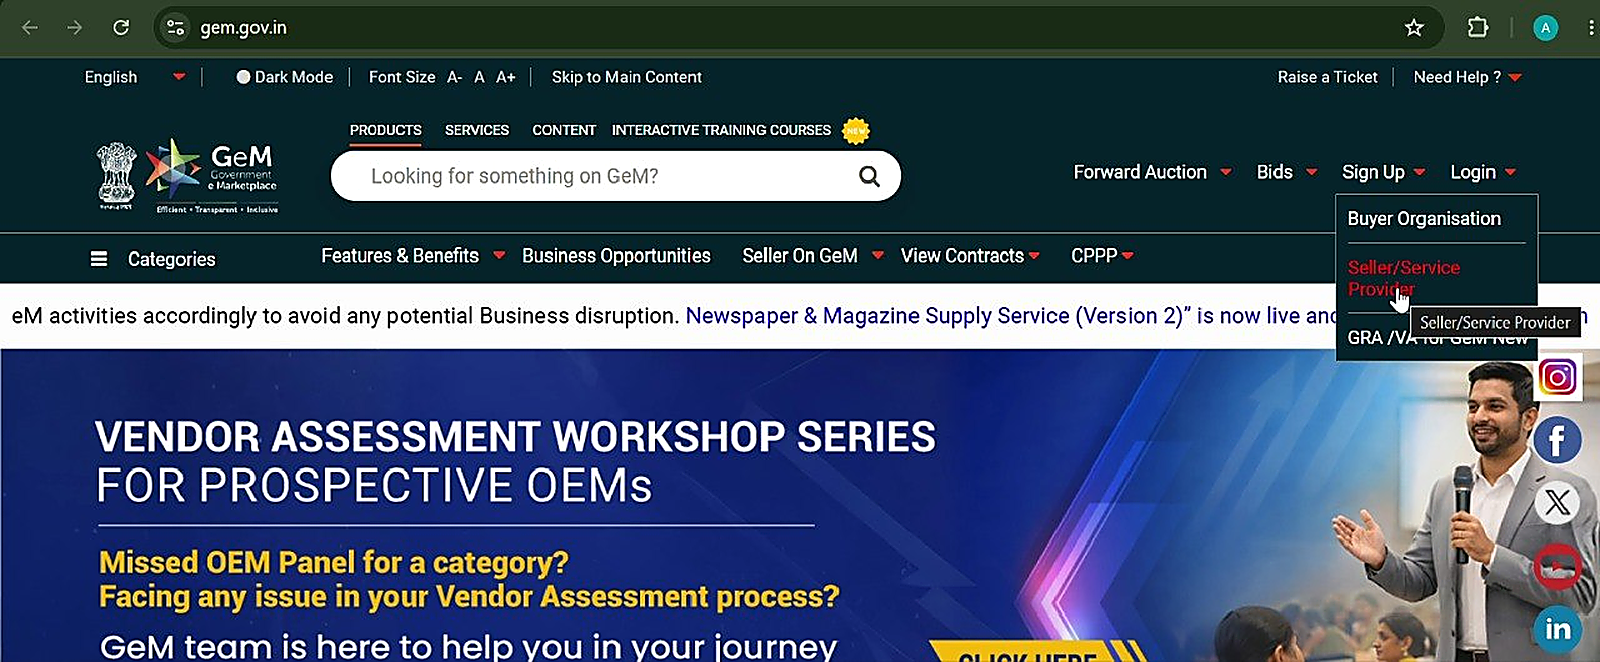
Go to gem.gov.in. In the top-right corner, click Sign Up and choose Seller/Service Provider. This takes you to the registration start page. (You don't need a DSC to create the account — that's only needed later, to sign and submit bids.)
Step 2 — Read the prerequisites and accept the terms
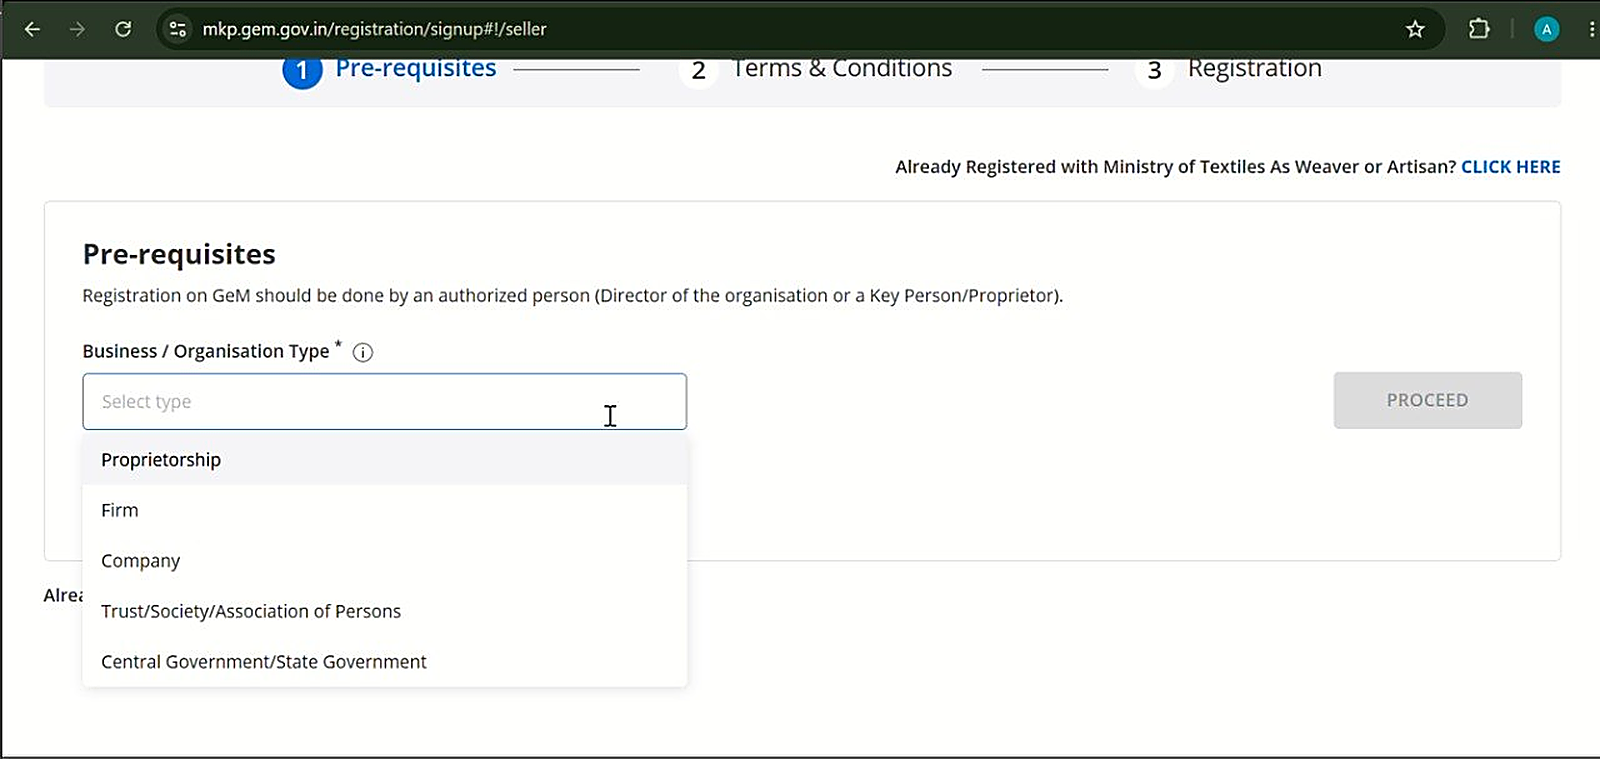
GeM first shows the prerequisites and the Terms & Conditions for seller registration. On this screen you also select your Business / Organisation Type to begin. Read the list of what you'll need, tick the agreement box, and continue. Don't skip past this — it spells out the exact documents and details GeM will ask for in the next screens.
Step 3 — Verify the authorised person (Aadhaar or PAN)
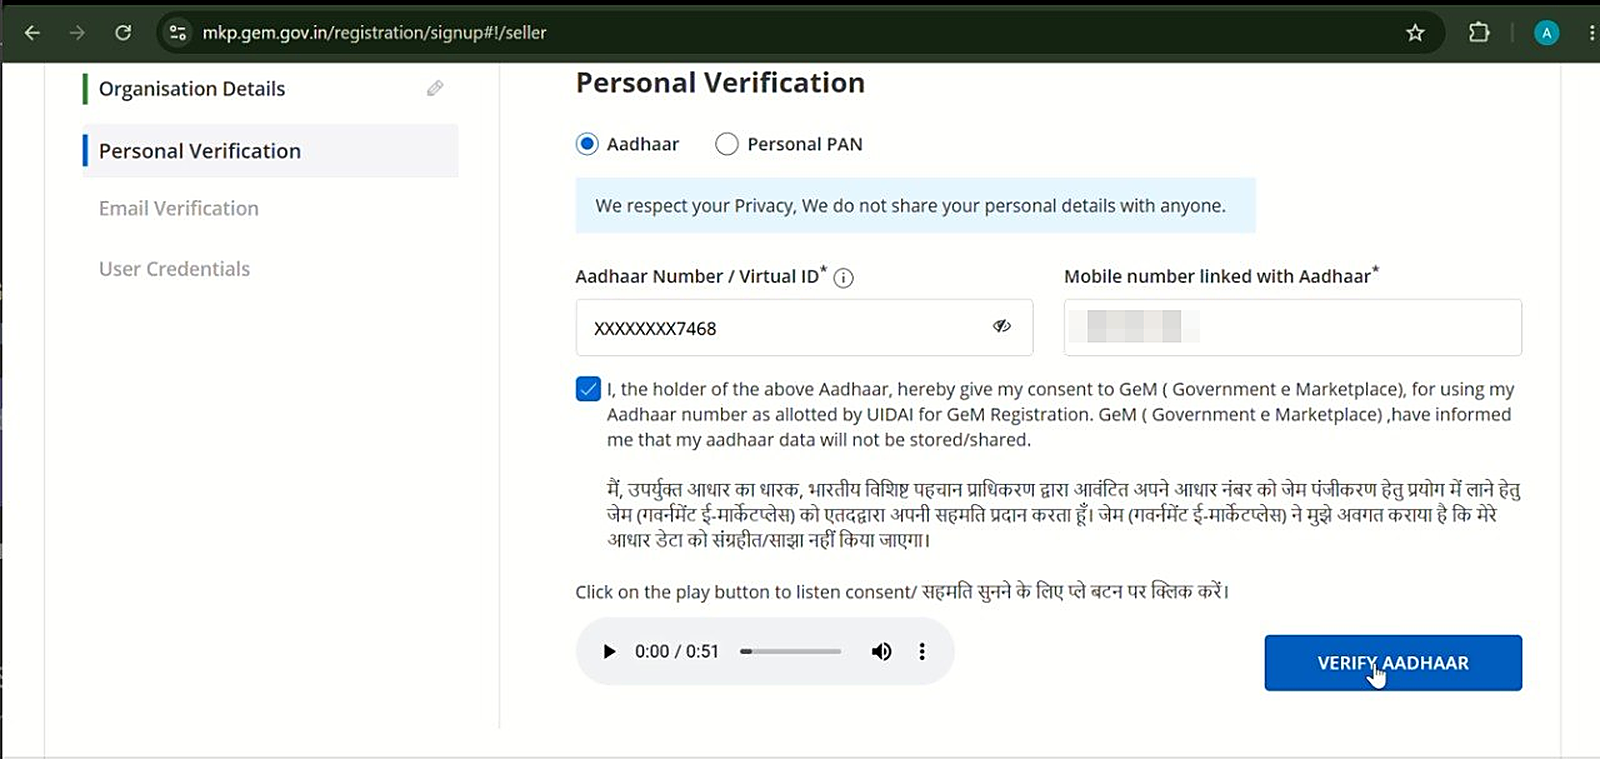
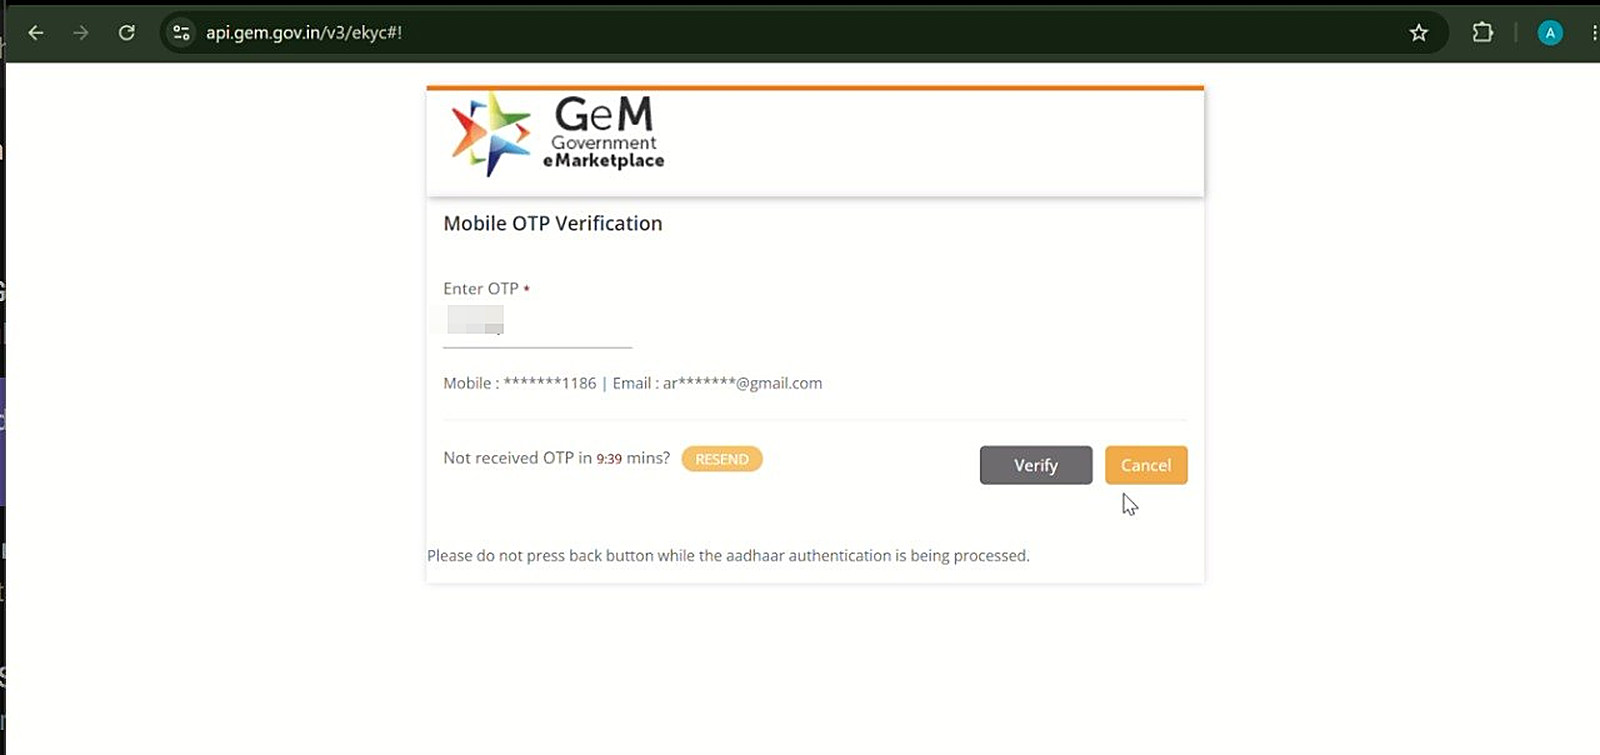
GeM verifies the identity of the person registering the business — the "primary user." Choose Aadhaar-based verification (eKYC) or PAN, enter the number, and authenticate. If you use Aadhaar, GeM sends an OTP to the mobile linked to it.
Step 4 — Enter your details and verify the OTP
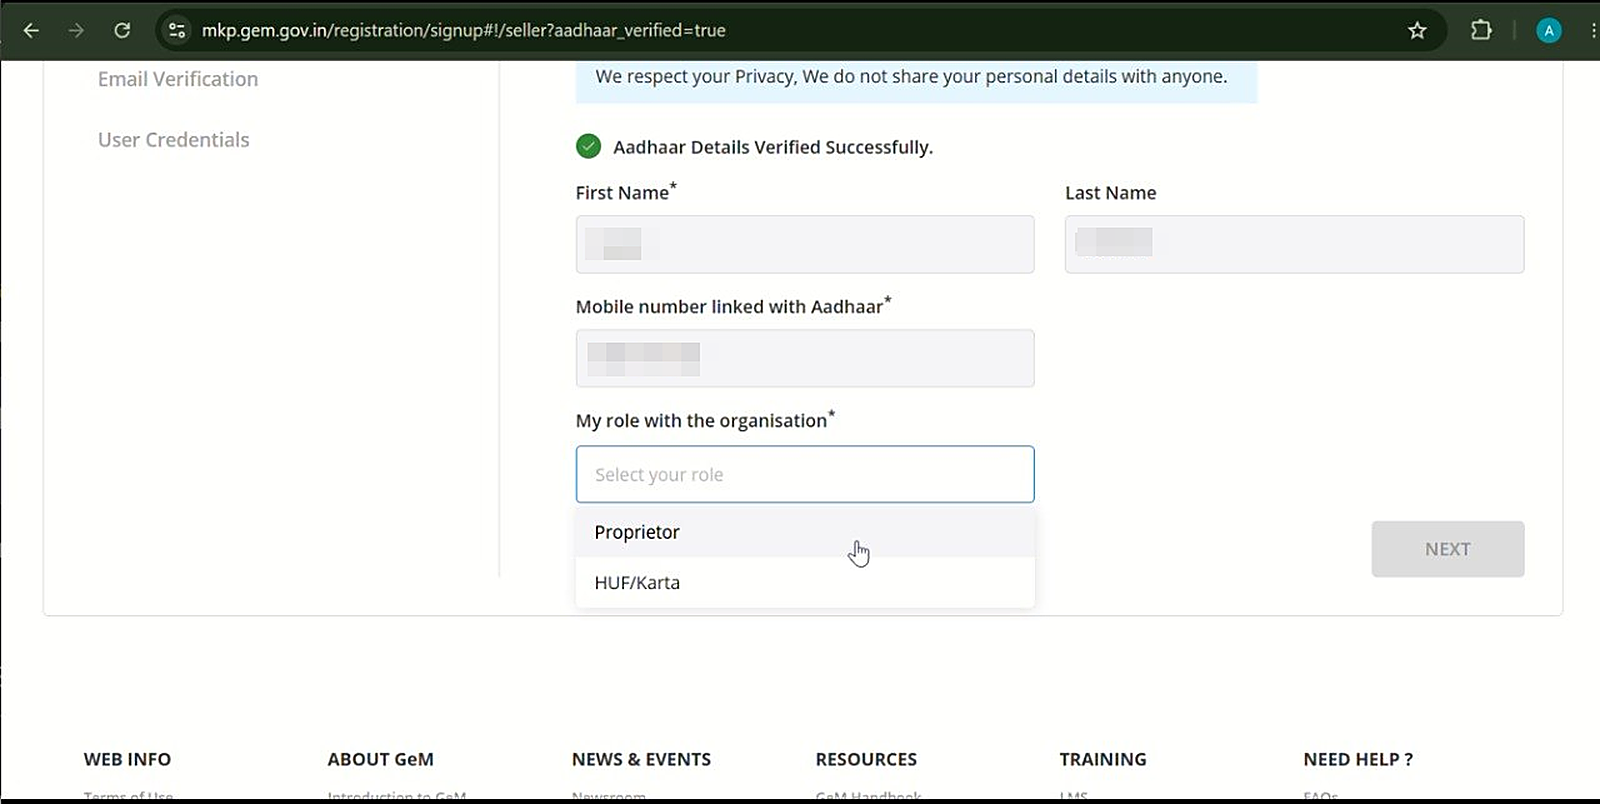
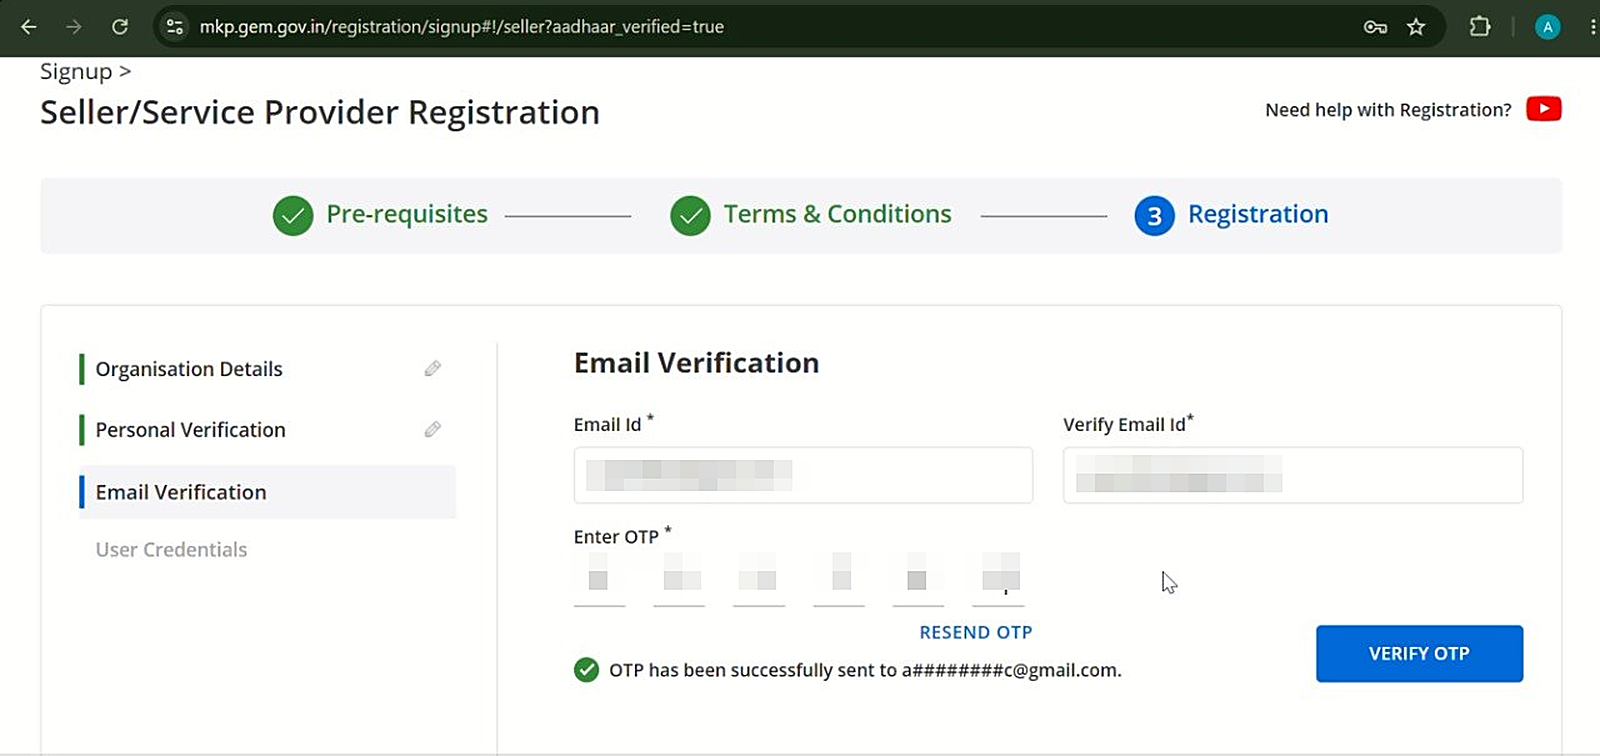
Fill in the authorised person's name, role, email, and mobile number. GeM sends a one-time password (OTP) to verify them — enter it to continue. Use a mobile and email you check daily; every future GeM alert, bid notification, and password reset comes here.
Step 5 — Confirm your organisation type and name
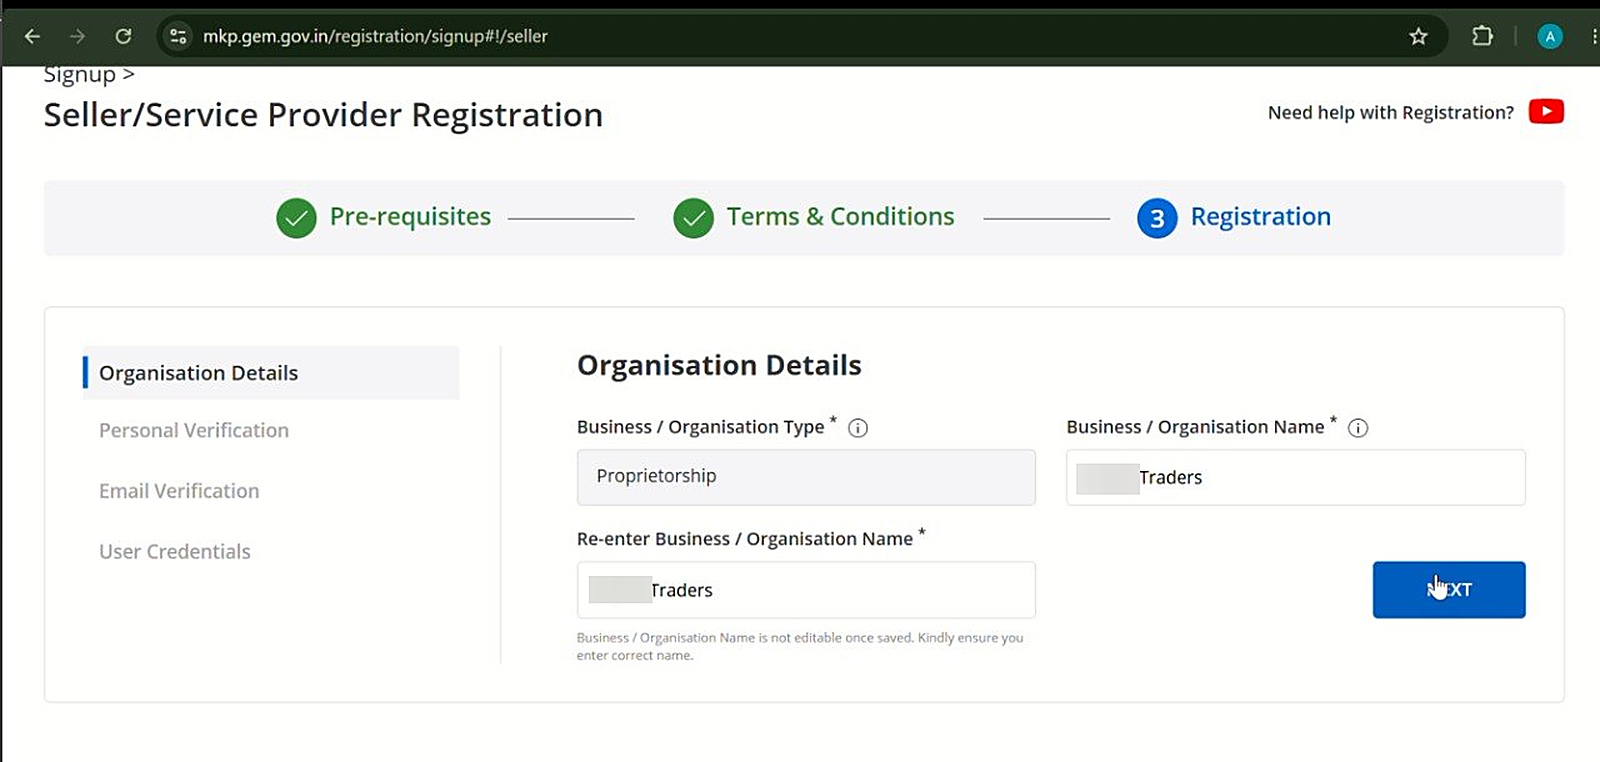
Your business constitution — Proprietorship, Firm, Company, Trust/Society, or Government entity — decides which documents GeM asks for next, so pick the one that matches your registration exactly. Getting this wrong is hard to undo later. The Organisation Details screen shows your chosen type and asks for your organisation name — and note GeM's own warning: the name is not editable once saved, so enter it carefully.
Step 6 — Enter and validate your business PAN
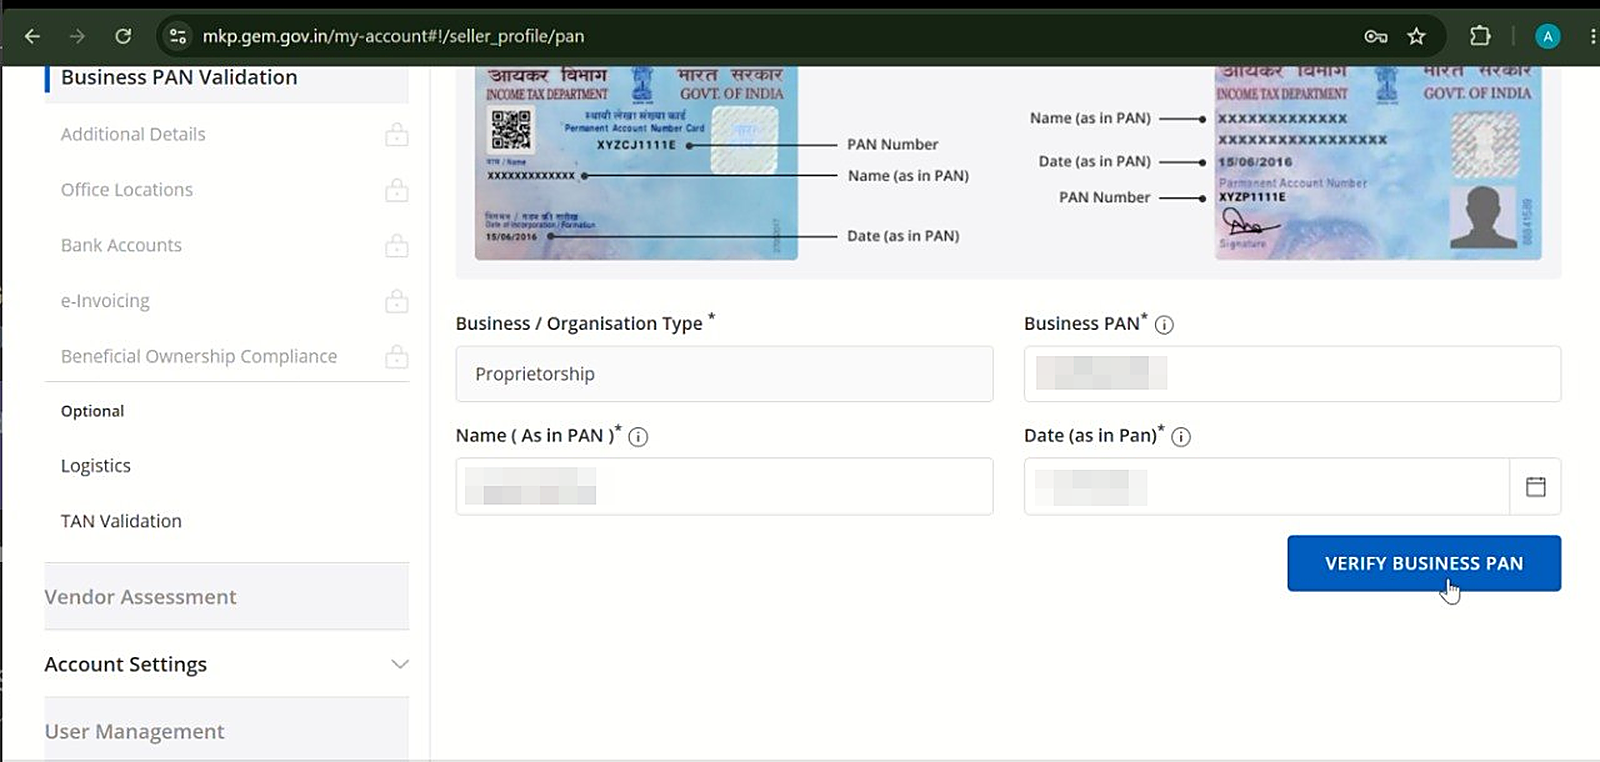
Enter the organisation's PAN (for a proprietorship, this is usually the proprietor's PAN). GeM validates it against the name on record. The business name you enter must match the PAN exactly — even a small mismatch throws an error here. This is the single most common place registrations stall.
Step 7 — Add your organisation and office details
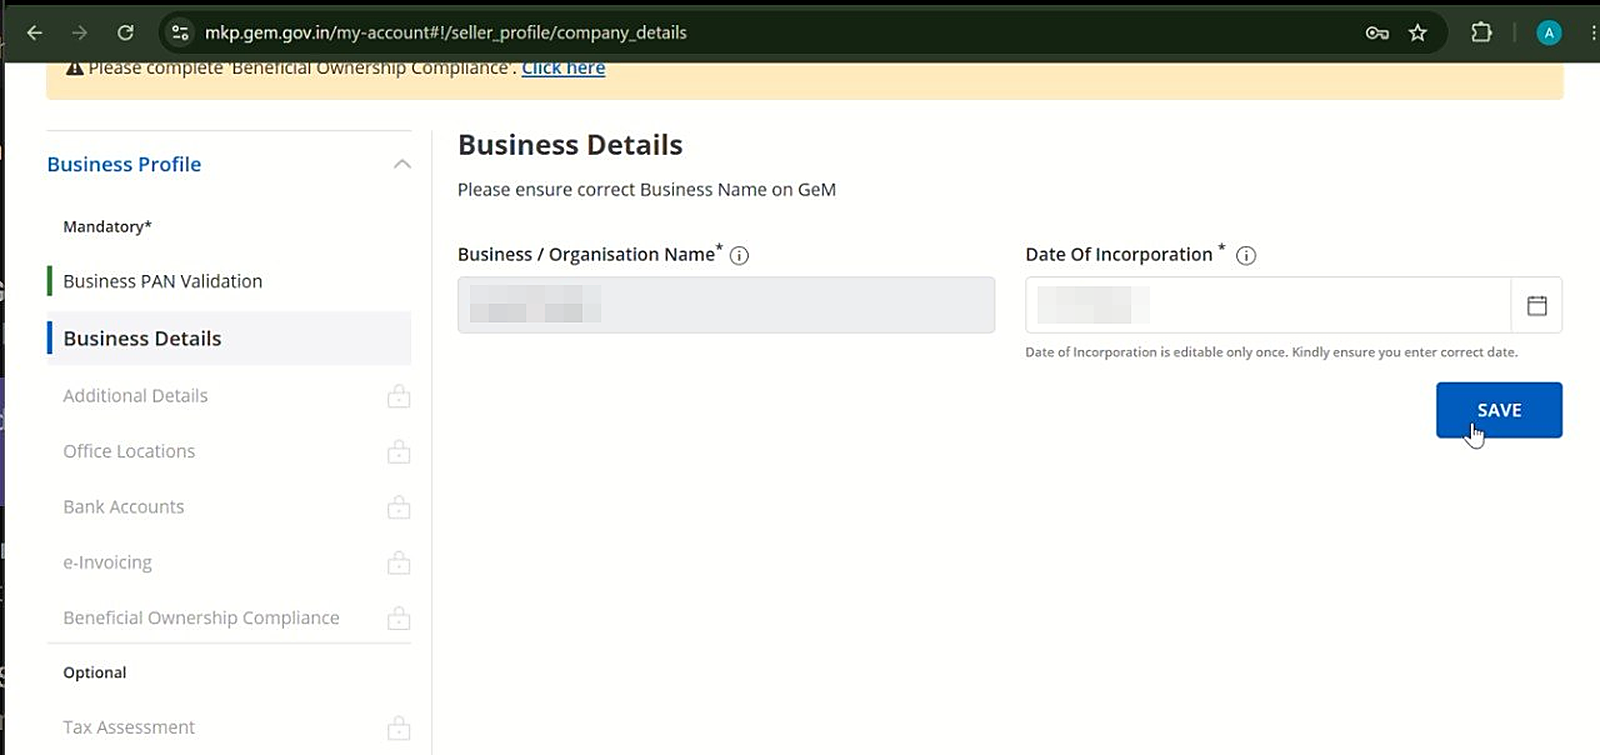
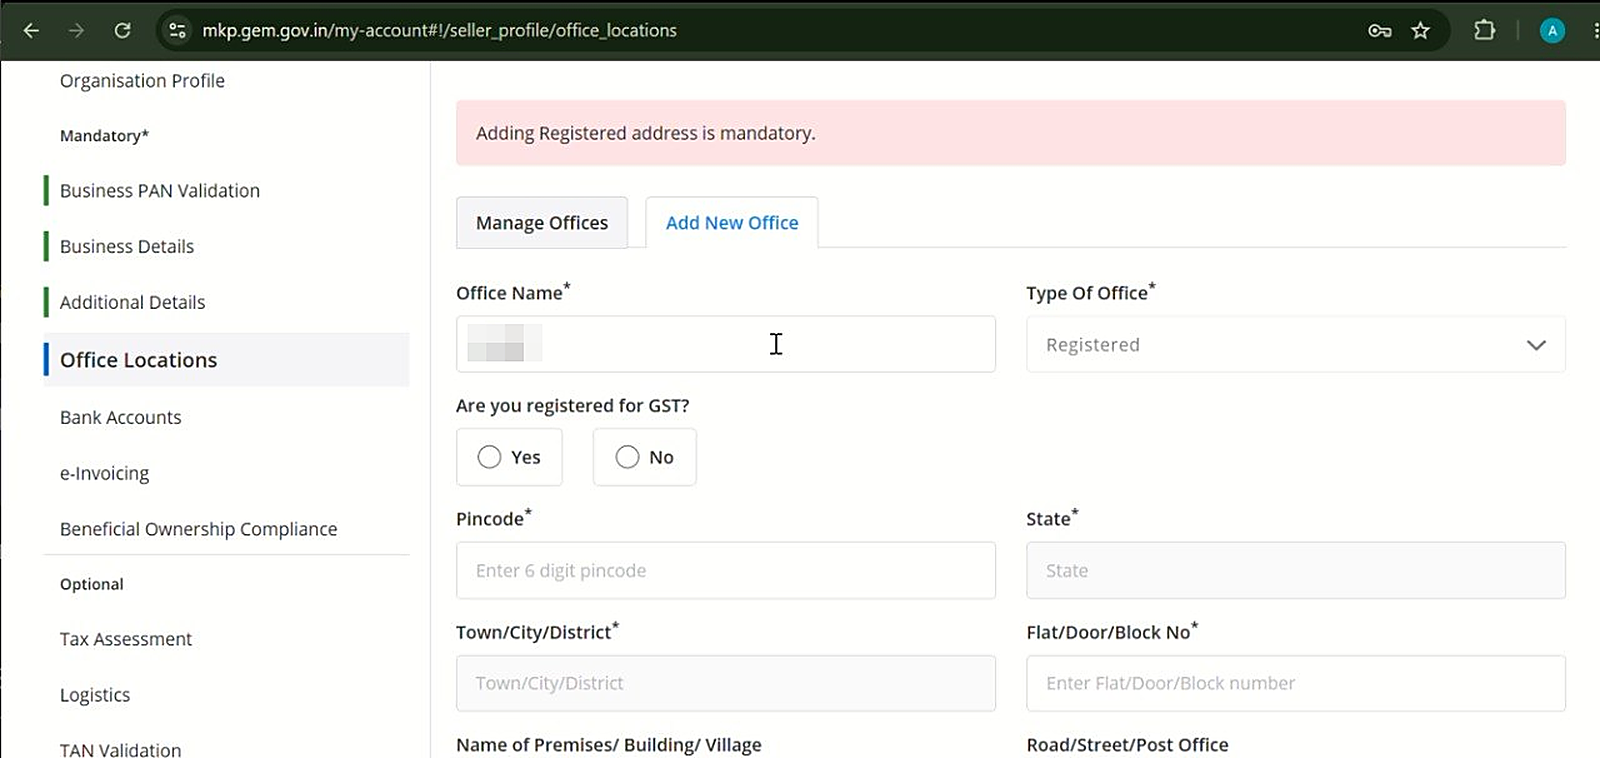
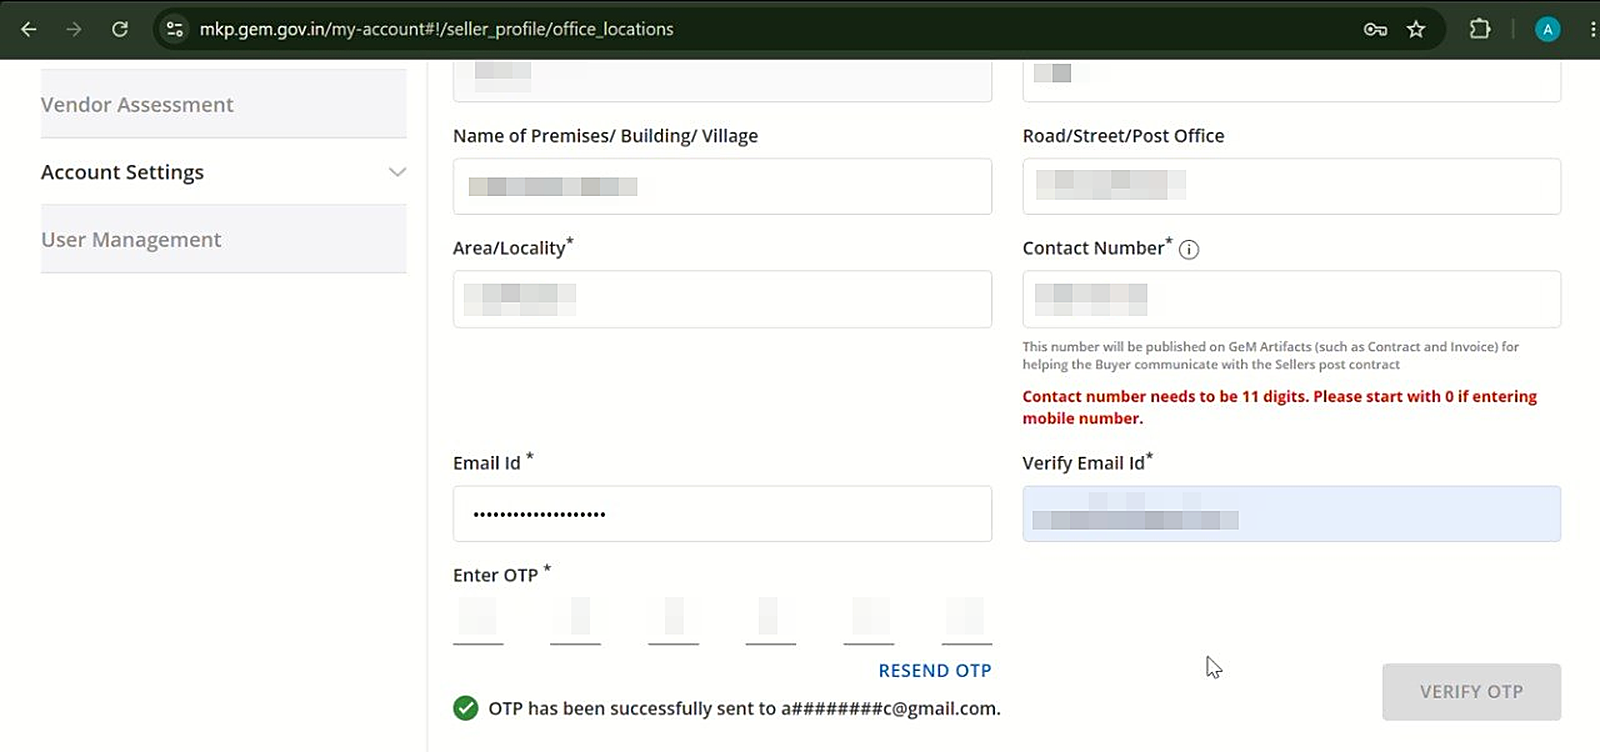
Fill in your business details, registered office address, city, state, and PIN code. If you operate from more than one location, add your branch/office addresses too — buyers and delivery terms sometimes depend on location. The office contact email is verified with one more OTP.
Step 8 — Add MSME (Udyam), GST and tax details
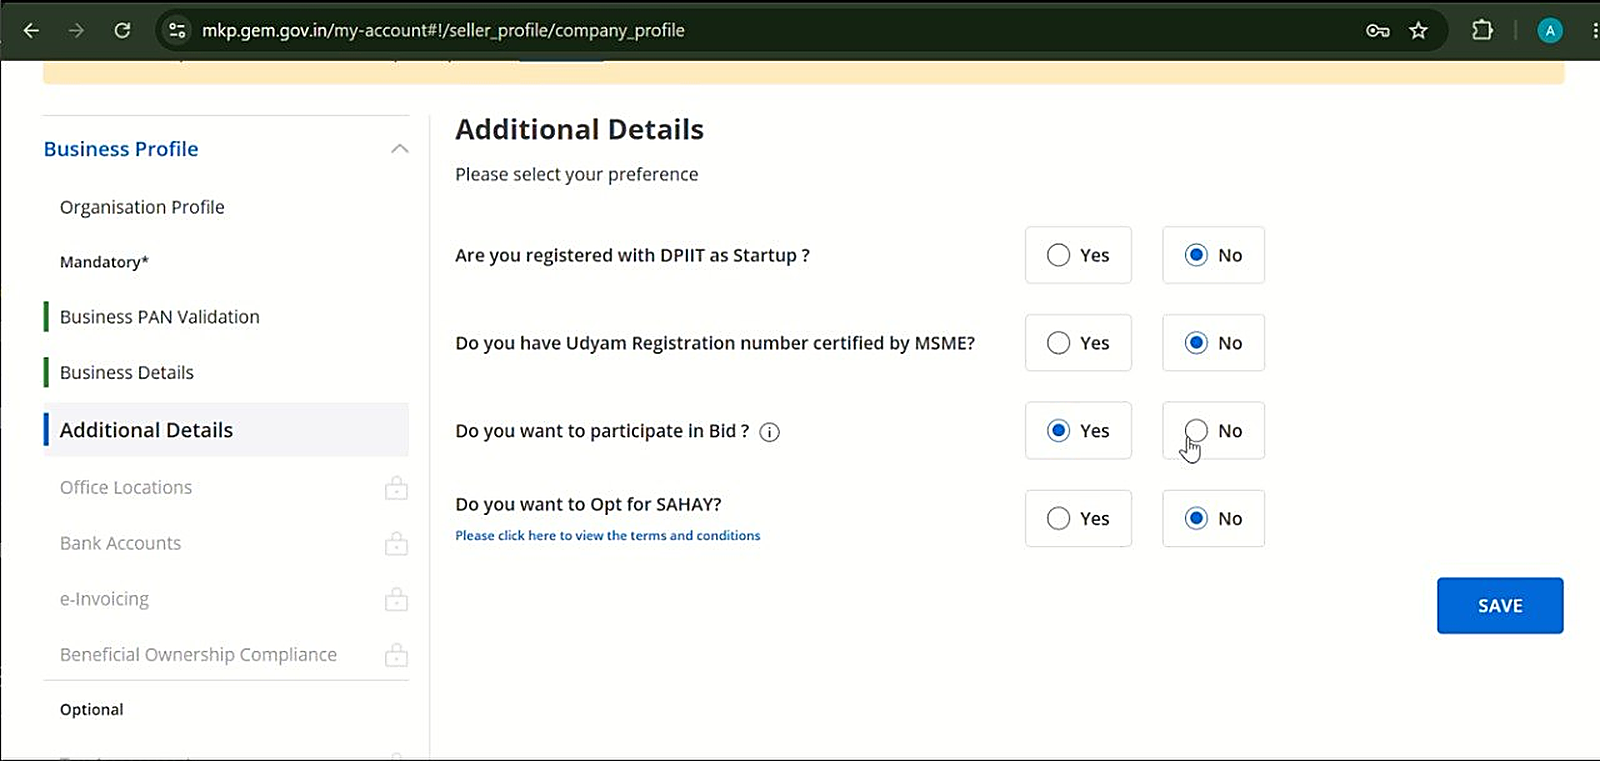
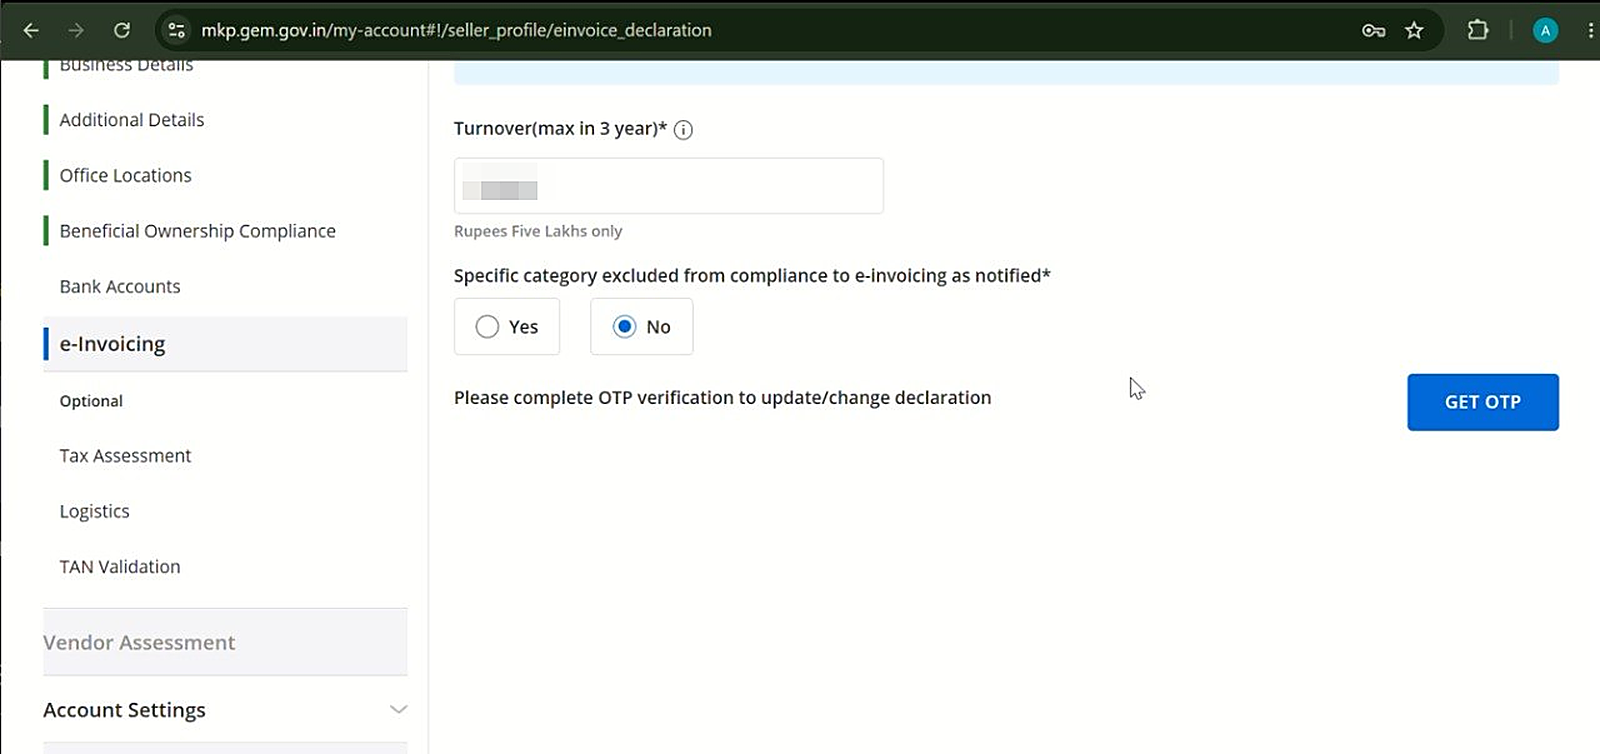
If you're an MSME, answer Yes to the Udyam question and enter your Udyam registration number here. This is the step that unlocks your MSE benefits on GeM — EMD exemption, reserved tenders, and purchase preference. Add your GST details if your business is registered, answer the startup (DPIIT) question, and make sure "Do you want to participate in Bid?" is set to Yes — that's the whole point. You'll also declare your turnover for e-invoicing compliance. Skipping Udyam means bidding without those advantages, so do it now if you qualify.
Step 9 — Add your bank account
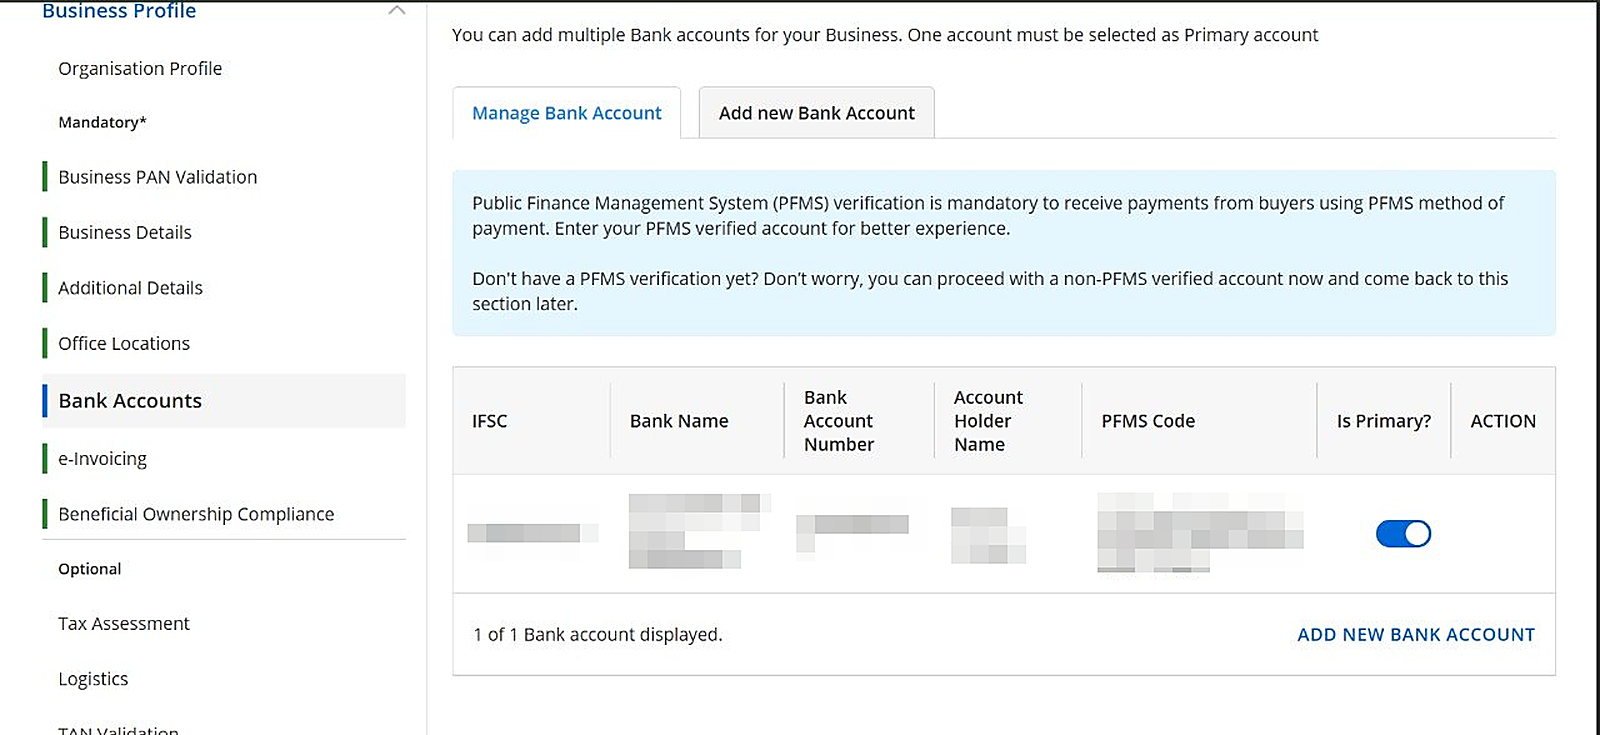
Enter the business bank account GeM will use for payments — account number, IFSC, and account-holder name. The account name must match your registered business name. PFMS verification is recommended for smooth payments, but GeM lets you proceed with a non-PFMS account and come back to this section later.
Step 10 — Create your login credentials
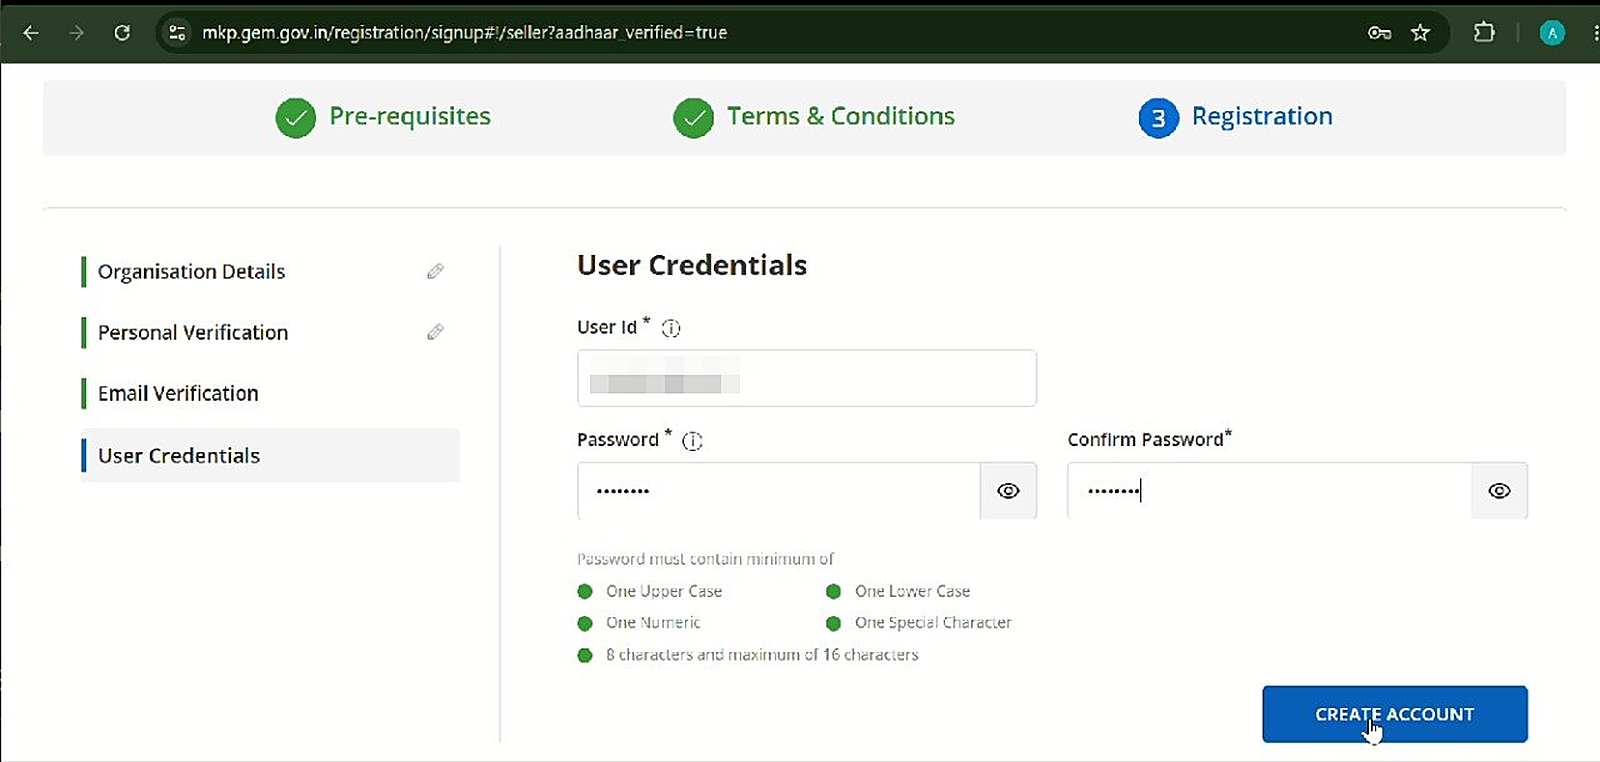
Set your GeM User Id and password. This becomes your seller login from now on, so choose something you'll remember and keep it private. Never share these credentials.
Step 11 — Submit and reach your dashboard
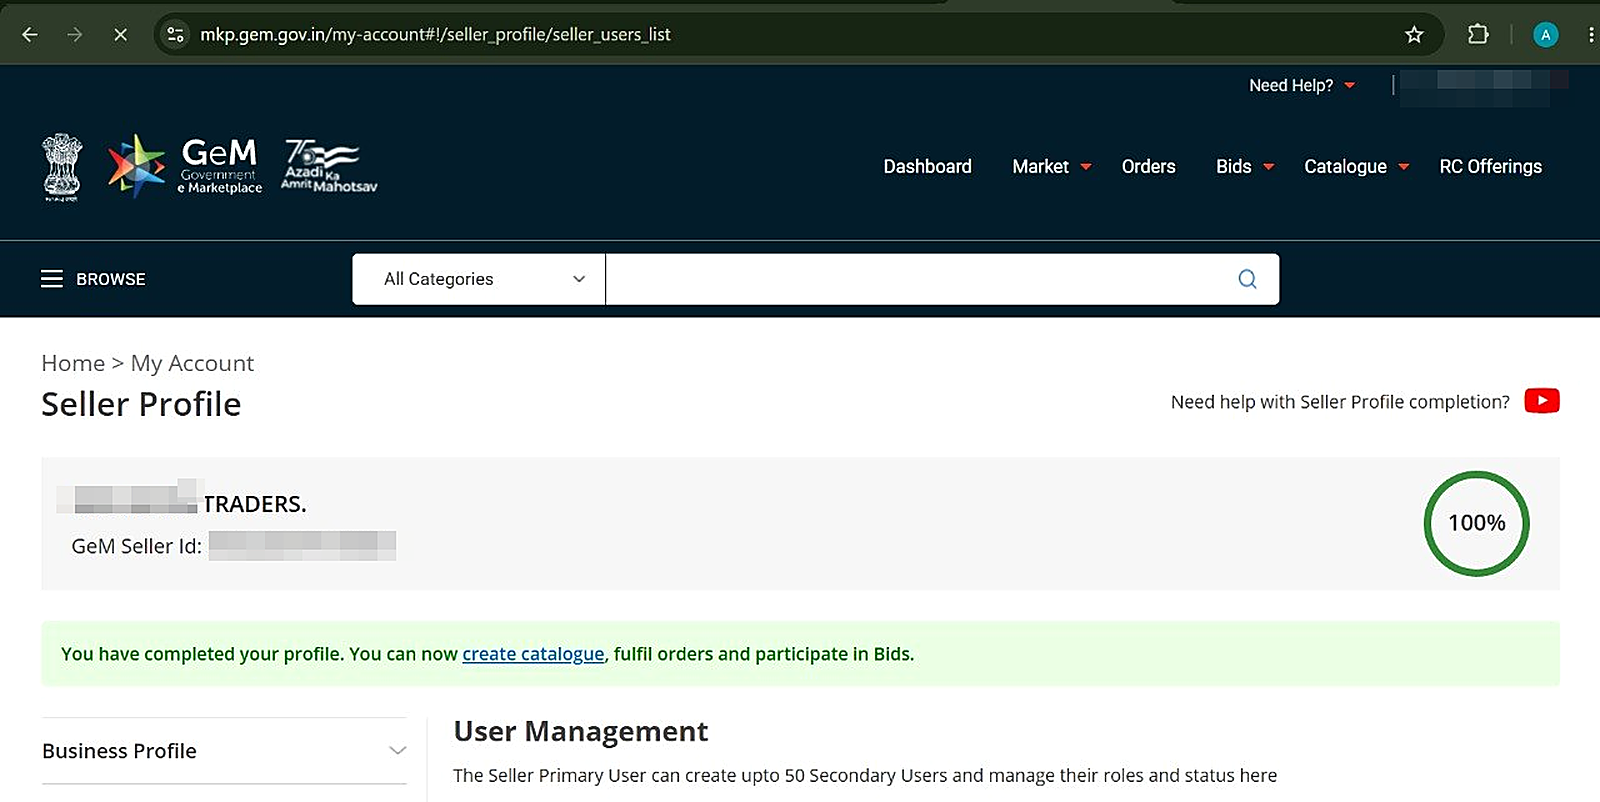
Review your details, submit, and GeM creates your seller account. Complete the remaining profile sections and you'll see your Seller Profile at 100% — with GeM's message that you can now create your catalogue, fulfil orders, and participate in Bids. That's it — you're registered.
Where people get stuck
The screens are simple; the snags are predictable. The most common ones:
- PAN / name mismatch. Your business name must match the PAN exactly — a missing initial or extra word will error. This stops more registrations than anything else.
- OTP not arriving. Make sure the mobile is active and has signal, wait a minute, then use "resend." For Aadhaar eKYC, the OTP goes to the number linked to your Aadhaar — if that's an old number, the check fails.
- Wrong constitution type. Pick the one that matches your actual registration; switching later is painful.
- Trader vs manufacturer/service provider. This affects your MSE benefits down the line (traders are generally excluded from the EMD exemption), so register under the correct activity.
After you're registered
Your account is live, but you can't win anything until you find the right bids and read them properly. That's the slow part — dozens of pages per tender — and it's exactly what BidSetu handles for you. We index every live GeM bid and pull out the eligibility, EMD, deadlines, and penalty clauses, so you spend your time only on bids worth winning.
BidSetu is an independent platform that indexes publicly available GeM data. We are not affiliated with GeM or the Government of India.